(Edited 1/17/2022 with updated gear suggestions to stay with technology)
As a hobbyist photographer, it’s very flattering that one of the most common questions I get is “How do you take such great photos?”
Actually, scratch that, I am lying. I rarely get asked that question – but what I DO get asked three or four times a week, is “What camera do you use?” which is perhaps the most un-flattering way that somebody could tell me they were impressed with a photo that I created.
See, that question stems from the fatal mistake that many amateur or aspiring amateur photographers make, in that assuming that a high quality photo can only be taken with high quality gear. This diminishes the fact that what really went into that great photo was a lot of experience, skill, and knowledge on how to best utilize technology to produce the end result, and really ends up sounding like a backhanded compliment to any photographer who sort of knows what they are doing. “Hey, your camera takes great pictures!” Yeah? Thanks, I taught it everything it knows.
But enough moaning; I guess it’s not the end of the world that somebody tried to give me a compliment. What kind of snob am I, huh? So basically what I’m here to do is show you a couple example photos that demonstrate that for the majority of photography work, gear is not the be all and end all. It’s all about preparation, and knowing how to utilize light effectively with the equipment you have. Add a dash of creativity and you’ve got yourself a delicious photo pie. Good reptile photography is about making sure all the ingredients go into the soup.
Photography, by definition means “Drawing with Light” if you break it down to its root words “Photo” and “Graph.” We are using these tools to capture and paint a picture with light, yet many newer photographers ignore the lighting and focus only on the equipment. When we learn to identify good lighting, produce our own, and modify it accordingly, we have gotten to the point where the tools used to do that are no longer of much significance and it is our own creativity and technical skill that will end up making or breaking the final result.
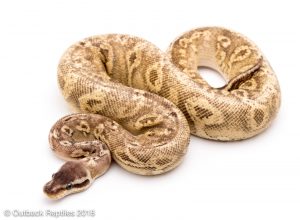
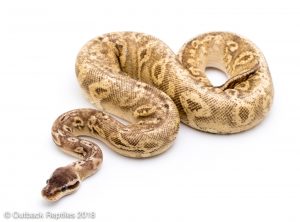
Here are two photos… one was taken with a ~$2000 camera/lens setup (Canon 7D mark 2 body with the Canon 60mm macro lens), and the other with a ~$500 camera/lens setup (Canon Rebel SL1 body with the kit lens). Both were lit with the exact same cheap $85 speedlight mounted above a box made of posterboard. Can you tell which was taken with which camera? (Mouse over them to find out)
So the moral of the story here is that expensive cameras are a huge waste of money, right? Not quite. What I am saying here, is that with a little thought put into how you use your equipment, you can produce good results with practically any reasonably modern camera gear.
Why do I have a 7D mark 2 when I can get by with a much cheaper setup? The truth is there are just some things that are a heck of a lot easier with better gear. My 7D shoots 10 frames per second and has 45 autofocus points. This makes taking photos of, say, a fast flying bird or a skateboarder kickflipping a set of stairs, way easier. But I could still theoretically take the same image, or an equally inspiring image, with the other cheaper camera.
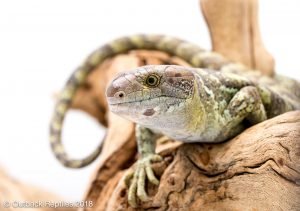
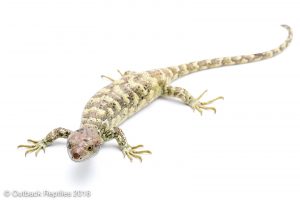
By “equally inspiring” what I am getting at, is that the most important part about your photo is the content and not necessarily the technical perfection. Let’s look at another two photos below. Both are technically sound (sharp in the right places, colors are good, etc) but I would certainly say the one on the left is a better image. This is of course subjective but I’d reckon many people would agree with me here. Context shows the animal doing what it does (climb), I waited for a cool expression, I composed the image in a pleasing manner… All of these things tend to make a “better” image even if I had taken it with a cheaper lens, lower megapixel count, et. etc. Of course, I do take most of my stock photos of reptile for sale the less exciting way, simply to show off the animals to potential customers. But I’ll also throw in a few more creative shots as well to make the ad more enticing.
See, now that you’ve given up on worrying about getting the most expensive stuff, and begun obsessing with how to perfectly utilize the gear you have- there’s still a whole creative side to photography that will lead you much further than equipment, and dare I even say technical prowess. All three of these things have their place but in the art of photography, the artistic aspect is sort of a big deal.
So what is my advice as far as which camera to buy? I am still not sure how to give a definitive answer to this, or if it is even possible. It all really depends on your needs. For somebody who wants to take great studio images of their ball pythons, but really has no interest in photography overall, I would say certainly save some money and get a nice entry level DSLR and a flash or two and go from there. Cameras these days are so advanced that a brand new entry level DSLR will likely perform well enough to last a decade or more for the average user. If you have mastered the technical use of your current equipment and find your creative drive limited by your gear, then THAT is when you should consider upgrading and looking at higher end options.
But I would totally hate to have tricked you into reading a whole god forsaken article on reptile photography camera gear, for me to just tell you “Oh, I don’t know, you’ll have to figure it out….” So here is a quick list of my recommended gear (with affiliate links to buy on amazon- you pay the same price amazon charges but they give me a few nickels for the referral, so I appreciate that!)
Cheap:
Body: Canon Rebel t7 with 18-55mm lens (Basically the same as the cheap option I used above) – BUY HERE
Lens upgrade: This is the one I use for 90% of my studio reptile work. Canon EF-S 60mm f2.8 Macro lens BUY HERE
Better:
Body: Canon 80D. Better autofocus than the t7, higher megapixel count, and a flippy screen! BUY HERE
Lens: I’d still go with the Canon EF-S 60mm f2.8 Macro lens BUY HERE
Pro (What I use now, 2022):
Body: Canon EOS-R. 30 megapixels, Mirrorless, fantastic. BUY HERE
Lens: Canon 100mm f2.8L Macro Lens. Super sharp, top tier “L” lens lineup from canon. BUY HERE
You will need the lens mount adapter to use this lens with the mirrorless body. BUY HERE
Flash stuff:
You’ll need these in order to light up your subjects.
Yongnuo speedlight ( BUY HERE ) with TX controller ( BUY HERE ) to make it go flashy without being attached to your camera. This way you can light your subject without being restricted by the flash being stuck in one place.
24″ softbox (makes your light pretty instead of direct and ugly. Soft shadows. Good.) $54 BUY HERE
There are of course much more advanced options for reptile photography specifically, but these are the two I’d recommend for most who are starting out or want decent stuff but still want to keep it simple. Keep an eye out on the website here and I will eventually be releasing a series of tutorials on how I create the images I do. I hope this post was a little enlightening and inspires some photographers to go out and shoot pictures with whatever gear they have, rather than worrying about what gear they don’t have.
-Mike


